Card & Fingerprint Management
Table of Contents
The card management section helps admin to manage cards in the organisation. Admin can search for cards with serial numbers or by user name and find out about assigned /not assigned cards.
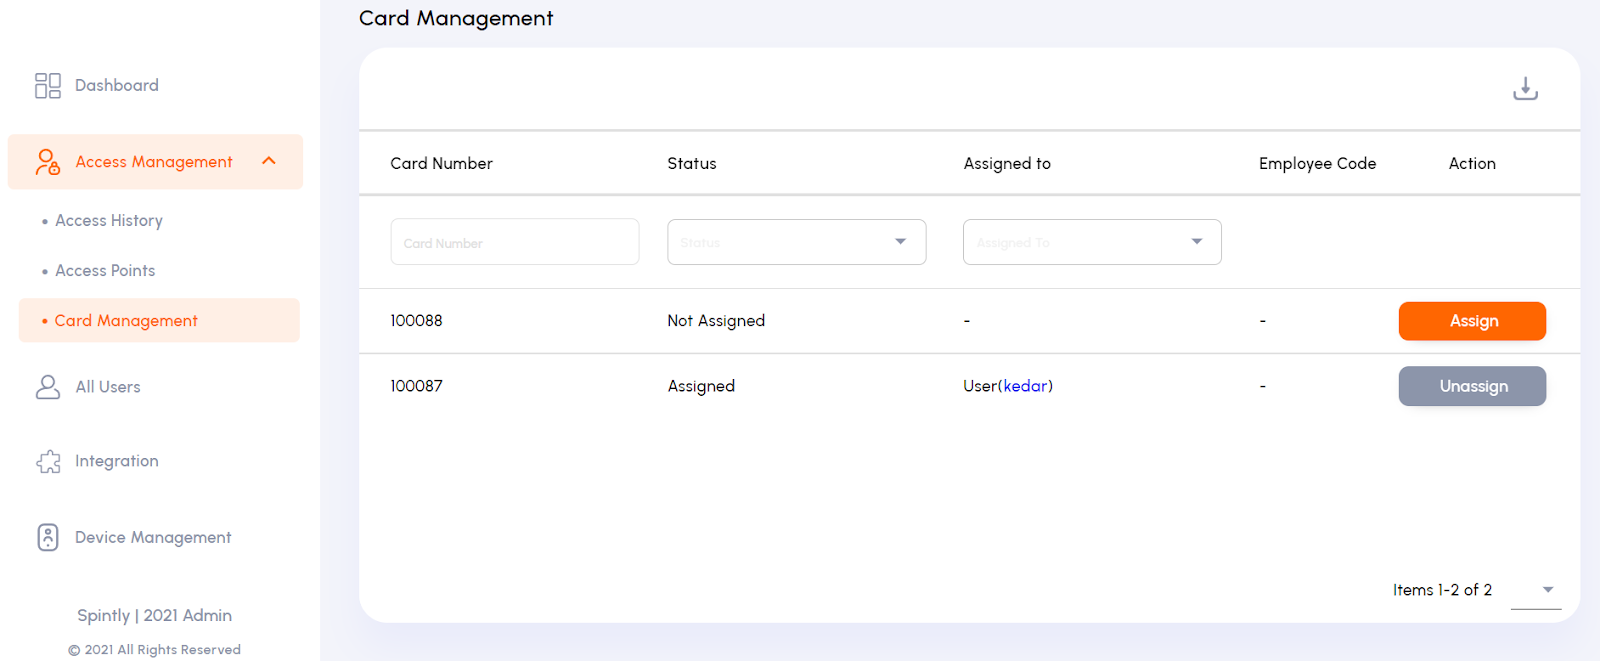
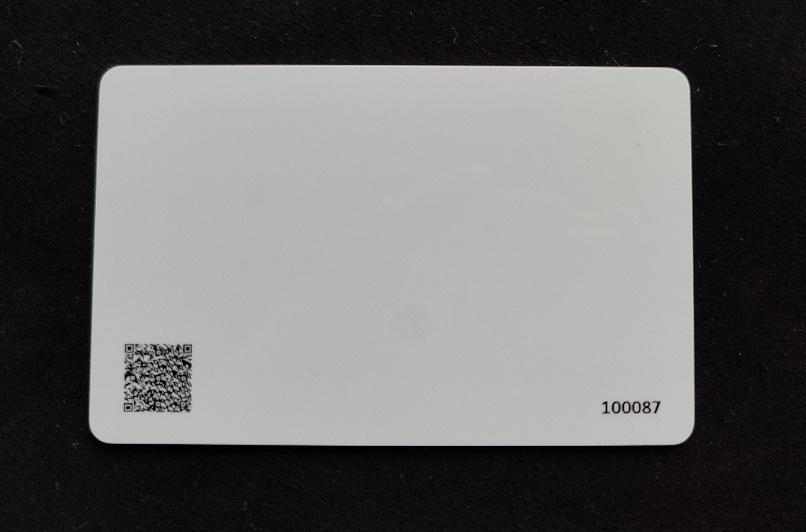
The card management tab will show only the Spintly cards (cards with serial number printed on it).
The cards supported by Spintly devices are Spintly cards and MIFARE Classic 1KB or 4KB cards.
How to enroll and assign NFC cards?
Below are the steps for the supported cards.
Card Enrollment from Spintly app - Only for Spintly cards
Spintly cards can only be purchased from Spintly. These cards come with a serial number printed on it as shown below.
These cards can be added to your organisation first for the easy assignment using its serial number. The adding process is called enrollment. To enroll the cards, follow the steps below.
- Open Spintly smart access app, make sure you have logged in with your administrator login.
- Click on the Admin console and select Card Management.
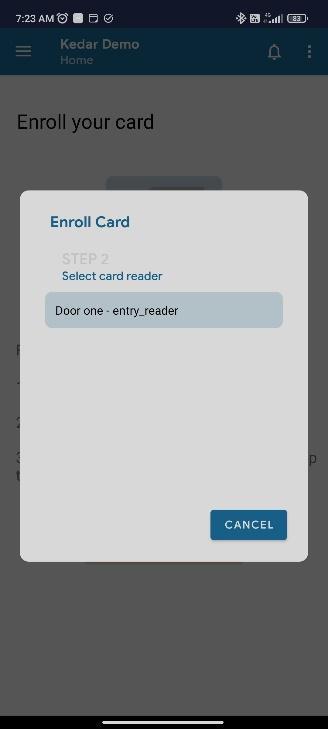
- To proceed, click START ENROLLMENT and click scan for card readers
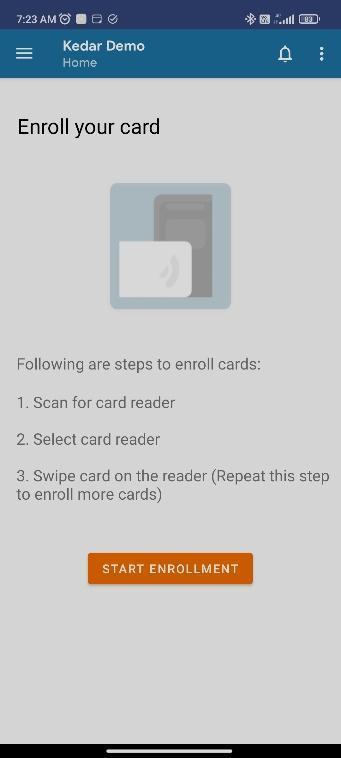
- It will scan nearby door readers, select the one which you want to use for enrolling the cards.
- Tap the cards to start enrolling.
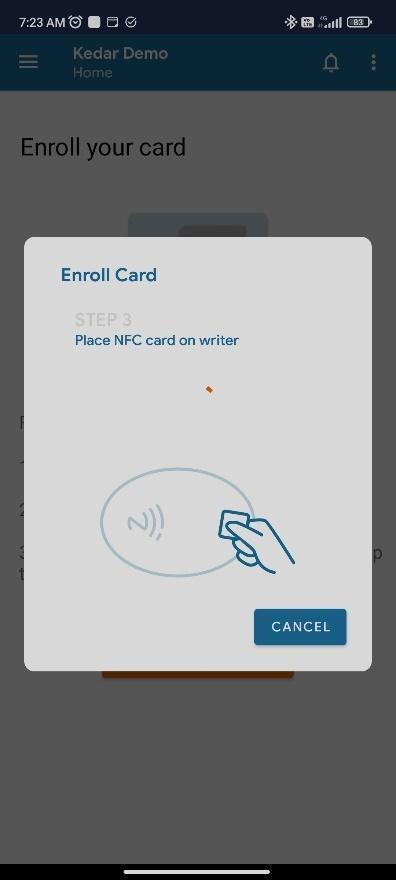
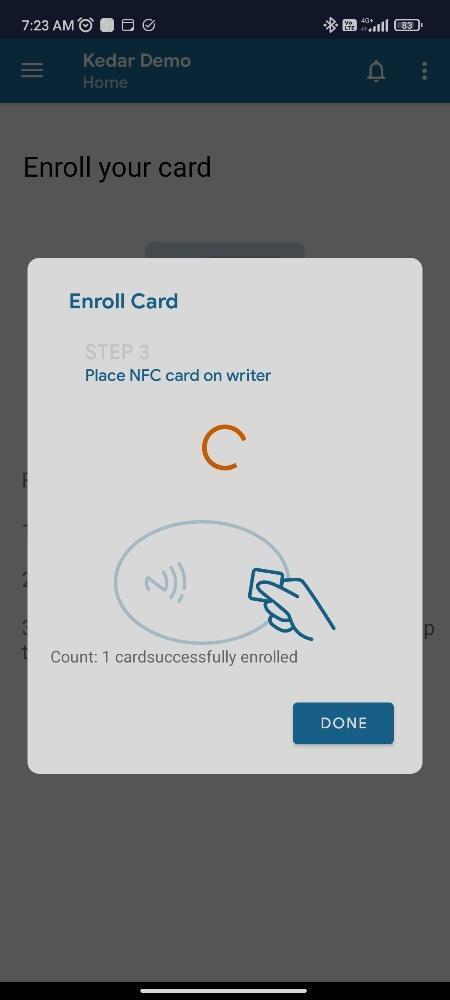
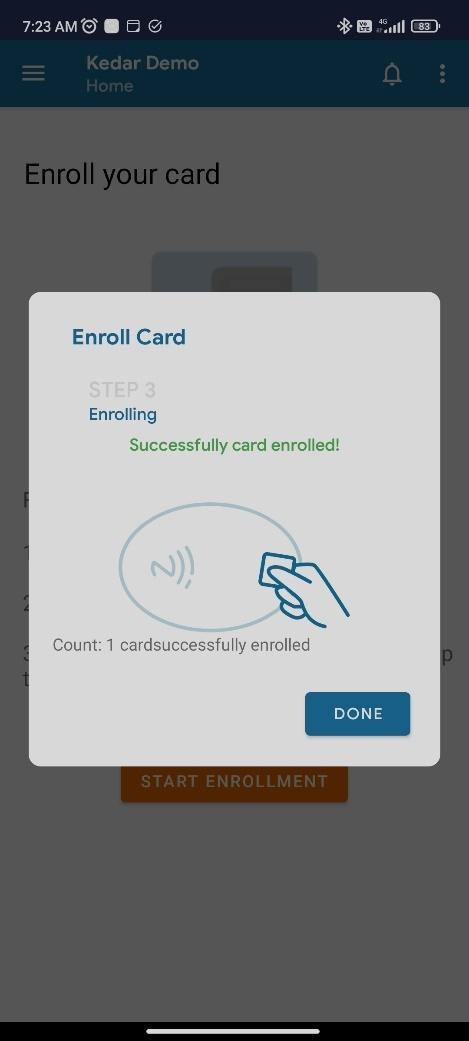
- You can continue enrolling cards by taping cards one by one and following the instructions on screen. The enrolled cards will appear in the Card Management tab as not assigned cards.
Note: If you have a Spintly card, you can directly ‘scan and assign’ it to a user instead of enrolling it by following assignment steps below, it will assign and enroll the cards at the same time.
It is suggested to enroll the cards first all at once as it will ease the process of assignment and once enrollment is complete, those cards can be assigned just by serial numbers easily.
Assigning cards
From web:
- Go to Card Management
- Search card number
- Click Assign and select user
OR
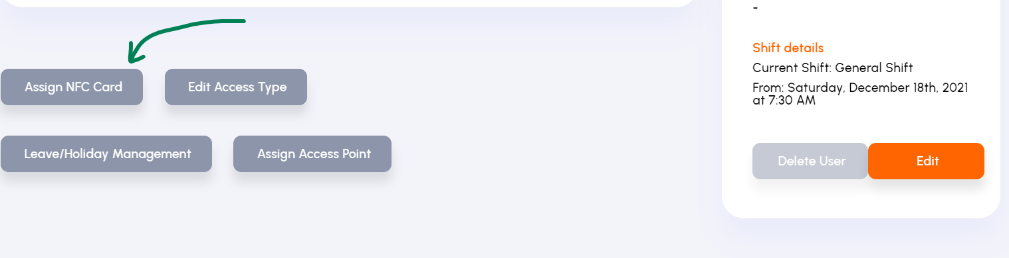
- Go to All Users
- Search and click on user name
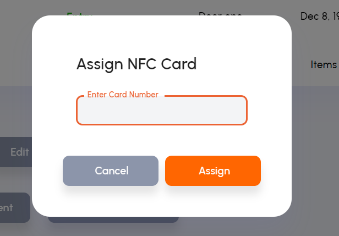
- Click the ‘Assign NFC Card’ button and enter the card number in the field.
From Smart access app:
- Open smart access app
- Go to Admin Console and User management
- Search name of the user and click on it
- Scroll to the NFC tab
- Click to add NFC card
- Enter the serial number if you have already the Spintly card enrolled. If the card is not enrolled yet or it is not a Spintly card, scan and select nearby device to ‘scan and assign’ the card.
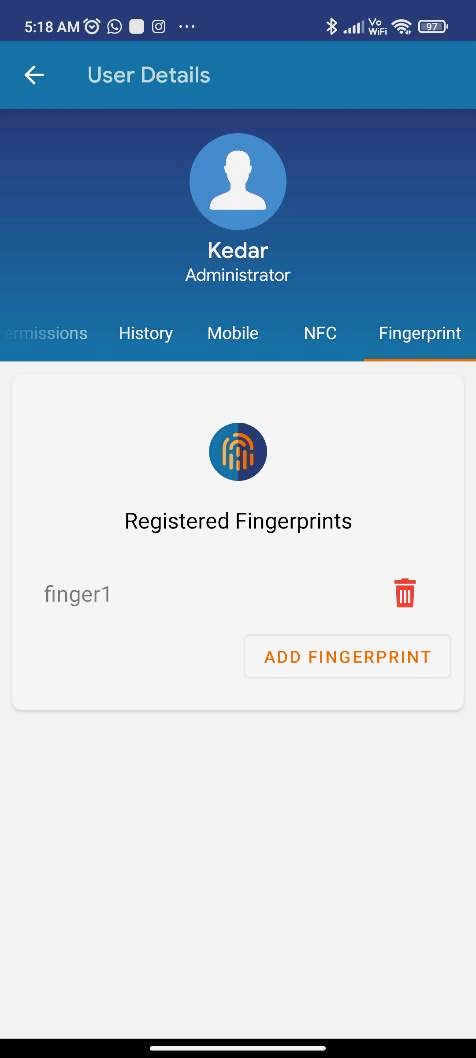
How to enroll Fingerprint from Spintly smart access app
Fingerprint can be enrolled under a user by following steps below.
- Open smart access app
- Go to Admin Console and User management
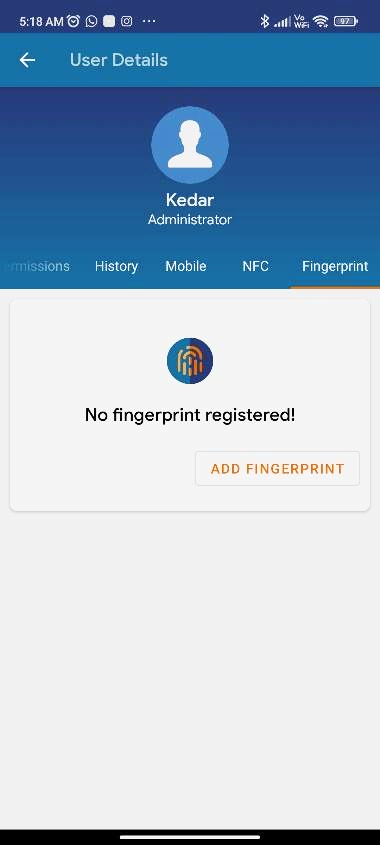
- Search for the user name and click on it
- Scroll to the Fingerprint tab
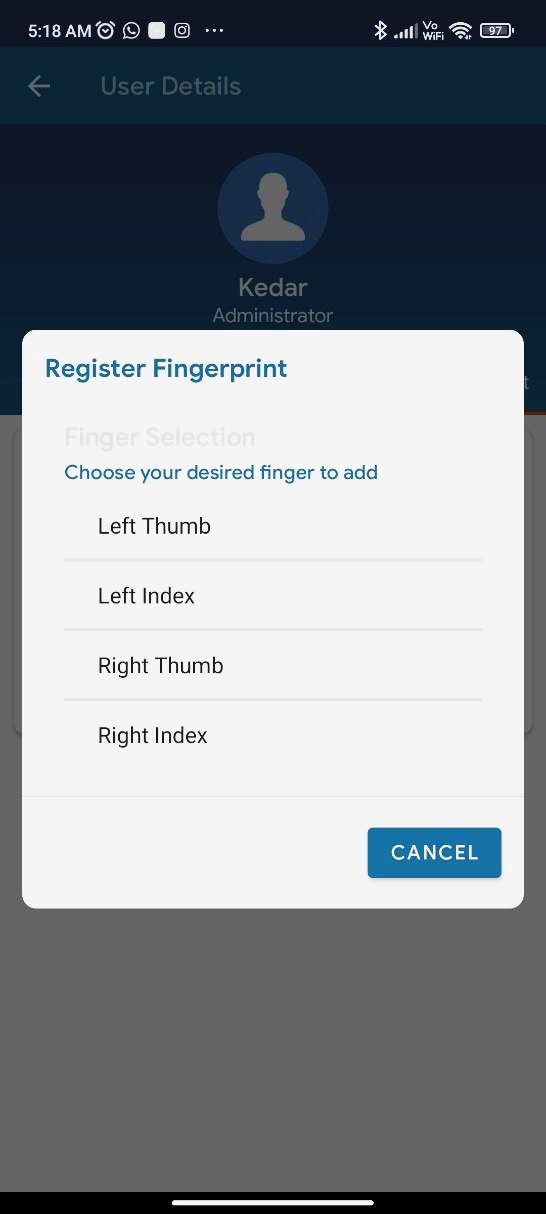
- Select ‘Add Fingerprint’ and choose the finger you want to enroll.
- Then it will ask you to select the finger which you want to enroll.
select the finger and choose the nearest fingerprint devices for enrolling, choose the one which you want for enrollment. - After selecting the device for enrollment, follow the instructions on the screen. It will guide you to tap the finger 3 times for enrollment and then register. After registering the fingerprint you should see a screen as shown below.
Synchronising fingerprint templates over all devices
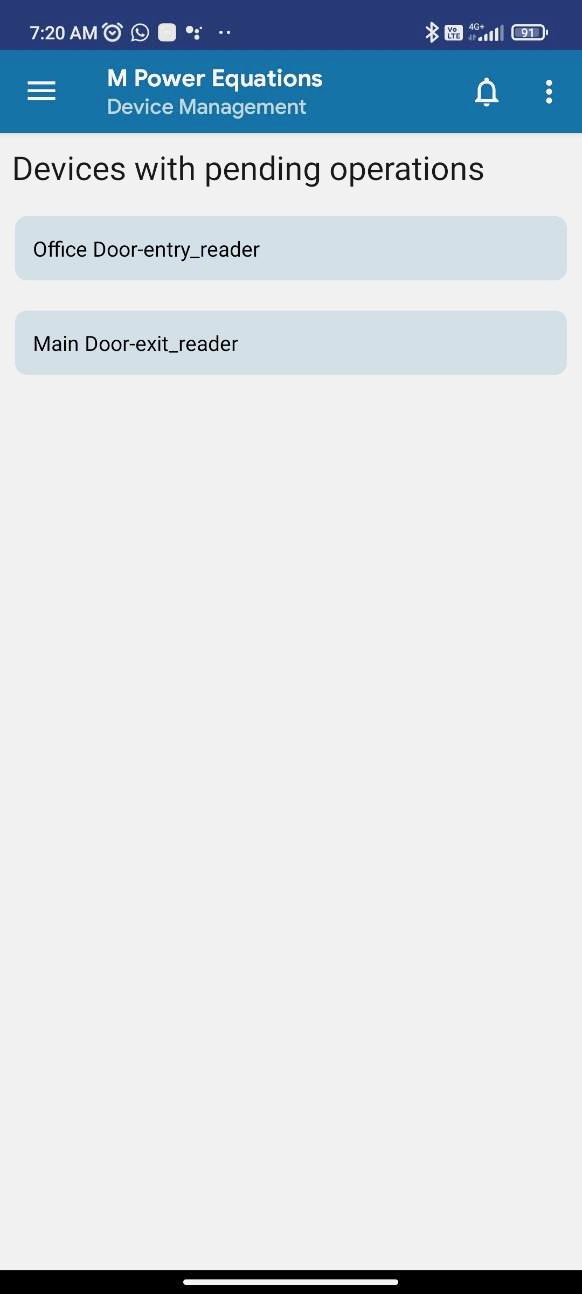
To enroll the fingerprint of the user, any Spintly fingerprint door device can be used by following the above steps. Once the enrollment is done, all these fingerprint user templates have to be synchronised on all the devices such that the access works on all the devices on which permissions are given. To do this, follow the steps below.
- Open smart access app
- Go to Admin Console and Device management
- If any device is pending for syncing they will appear here in the list
- Go near these devices and click on it to start the sync.
- Once you click it will connect and sync all the pending templates and after the operation is complete the device will go away from the list.